
Appnatively
Appnatively
Knowledge Base
Go to Studio
Knowledge Base
Go to Studio
Getting Started
Welcome to AppNativelyCreate your first appFinding your way around the Studio dashboard
Website Connection
Connect your website to AppNativelyInstall and update the required pluginChoose which plugins power your app“Website Not Connected” – what it means and how to clear itFix a failing or dropped connection
App Editor
Build your app with AI chatWrite prompts that get the screen you wantUndo an AI change you don’t wantEdit screens and components by handManage your app’s pagesDesign your headerDesign your bottom navigationAdd and edit drawersManage your themeHow your changes reach your usersSave vs. Publish – what each one doesWhen a new release is requiredWhen AI gets it wrong
Splash & App Icon
Set your app iconAdd Android Adaptive Icon layersDesign your splash screenRecommended image sizes
Publishing Setup
What you need before your first buildSet your app’s name, slug, and package IDAdd Android credentials and your keystoreAdd iOS certificates and provisioningConnect Google PlayConnect the App StoreSet up Firebase Configuration
Build & Deploy
Connect GitHub before you buildBuild your app – and submit it to the storeFix a failed build
Push Notifications
Create and send a push campaignTrack campaign performanceNotifications aren’t arriving
Integrations
Connect a third-party service

Set your app’s name, slug, and package ID

Three fields here define your app’s identity to AppNatively, to app stores, and to your users’ devices. Two of them deserve extra care – they’re much harder to change once you’ve built and submitted your app.

Steps

1. Go to General settings

Open Settings → General.
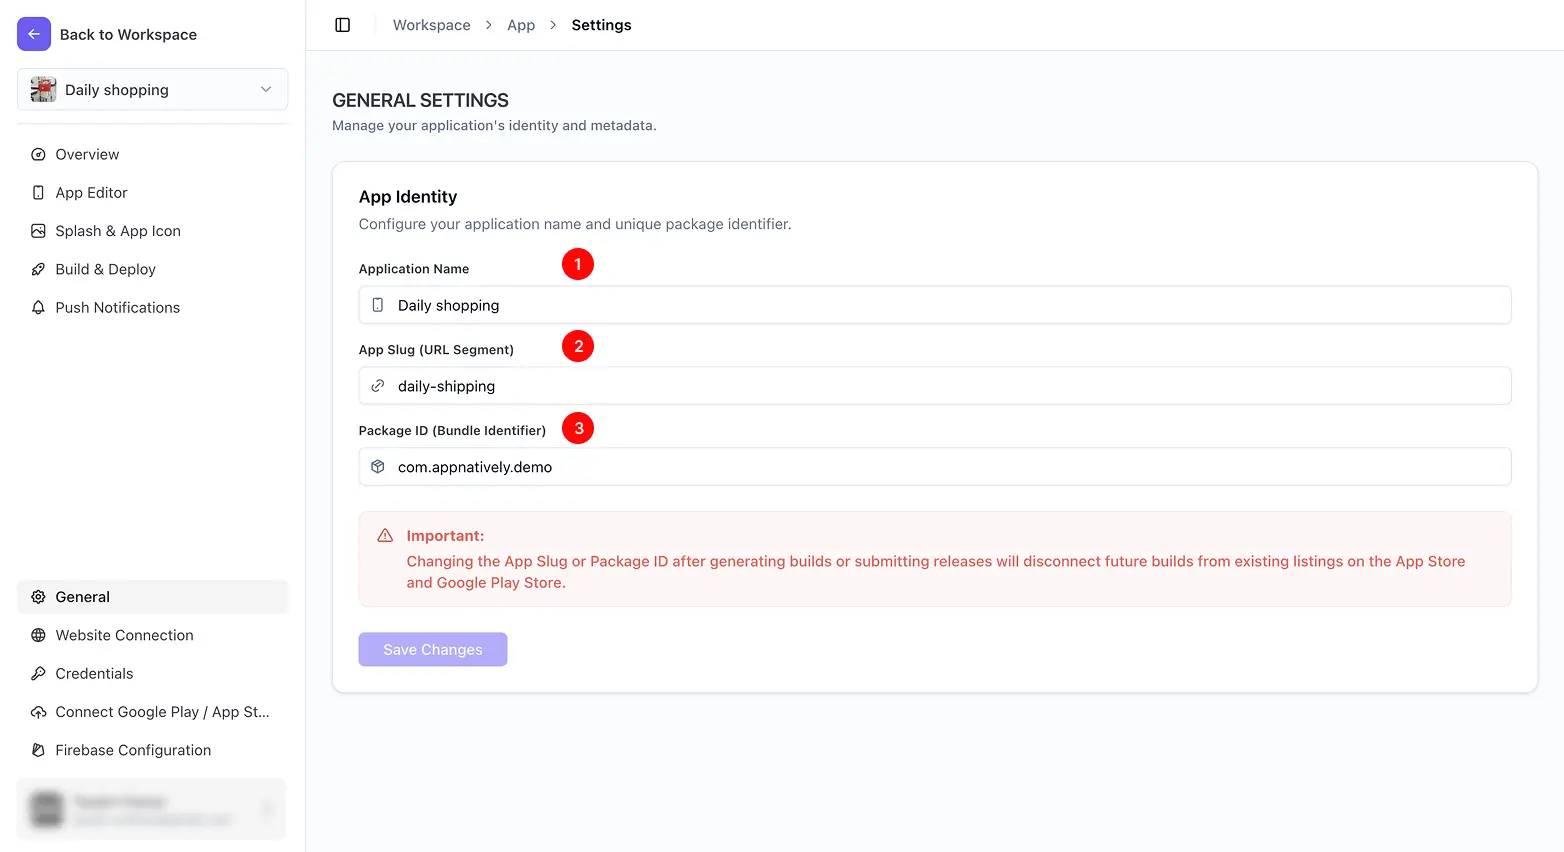
2. Set your Application Name

This is the name your app is known by – it appears on the store listing and under your icon on your users’ devices.

3. Set your App Slug

A short, web-friendly version of your app’s name, used internally within AppNatively. Lowercase letters, numbers, and hyphens only.

4. Set your Package ID

Also called a Bundle Identifier, this is a one-of-a-kind ID that tells Google Play and the App Store this is your app and no other – something like com.yourbrand.yourapp.

5. Save your changes

Set this once, early

FAQ

What you need before your first build
Add Android credentials and your keystore
Was this page helpful?
On this page
Steps1. Go to General settings2. Set your Application Name3. Set your App Slug4. Set your Package ID5. Save your changesSet this once, earlyFAQCan I change my Application Name after launch?+What happens if I change my Package ID after submitting to the stores?+Is there a length or character limit on the App Slug?+