
The Studio dashboard has two “modes” depending on whether you’re looking at your whole workspace or one specific app. Knowing which one you’re in – and how to jump between them – makes everything else in AppNatively easier to find.
Your workspace view
This is what you see right after logging in, before opening any specific app.
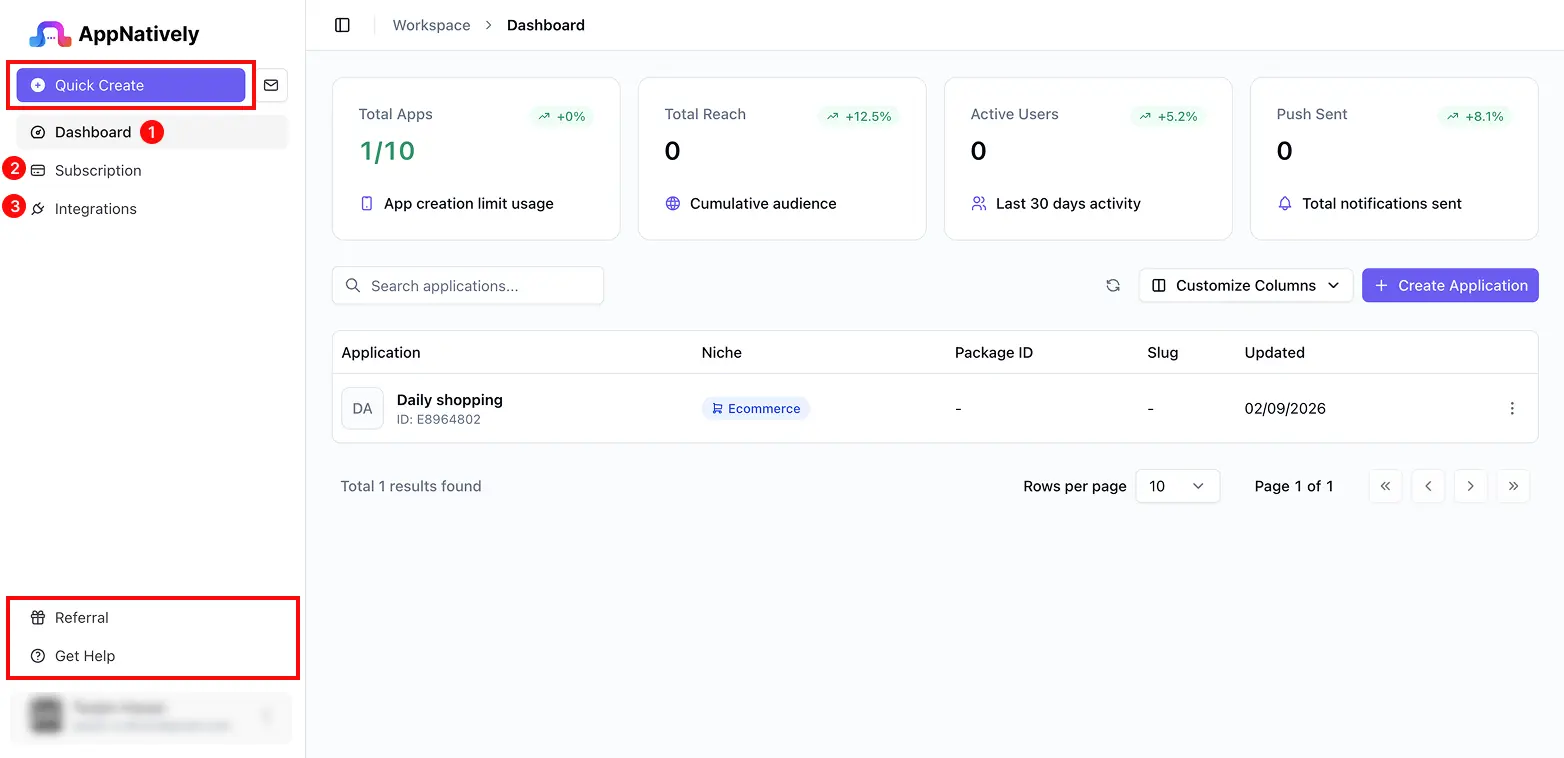
The sidebar here has three sections:
- Dashboard – the list of every app in your workspace.
- Subscription – your plan, billing details, and app limit.
- Integrations – connections that apply across your whole workspace rather than to one app (see Connect a third-party service for what lives here).
At the very top of the sidebar sits Quick Create, for starting a new app from anywhere (see Create your first app). Near the bottom you’ll find Referral and Get Help, which take you to the referral program and this Help Center.
Opening a specific app
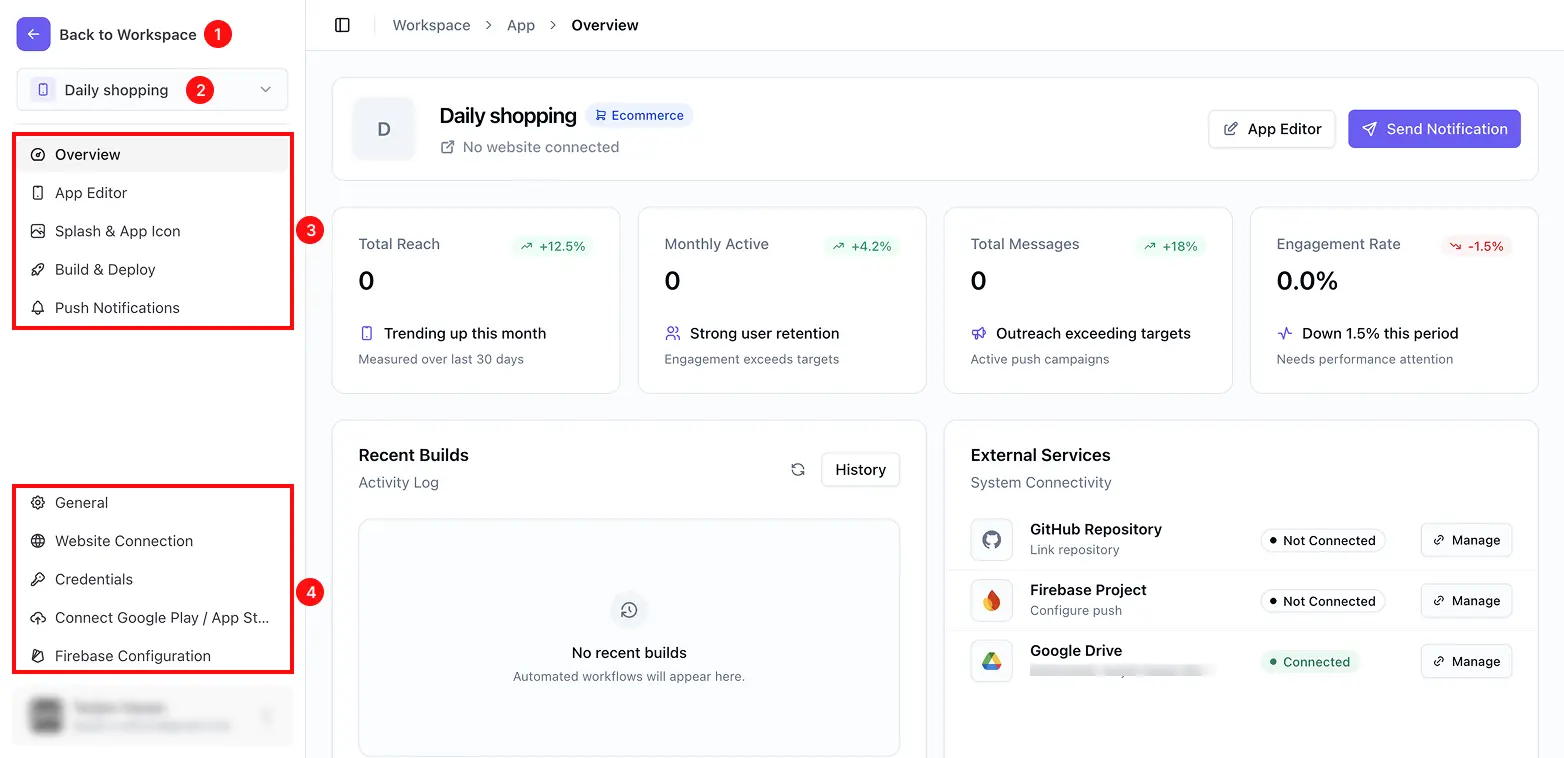
Click any app from your Dashboard list to open it. The whole sidebar changes to reflect that one app – you’ll notice a “Back to Workspace” link appear at the very top, which is always your way back out.
Switching between apps without leaving
Right below “Back to Workspace” is the app switcher – click it to open a dropdown of every app in your workspace and jump straight to a different one, without going back through the Dashboard list first.
The main sections for this app
- Overview – a snapshot of this app (see below).
- App Editor – where you design your app’s screens, navigation, and look.
- Splash & App Icon – your app’s icon and loading screen.
- Build & Deploy – where you build your app and send it to the App Store and Google Play.
- Push Notifications – send and track messages to people who’ve installed your app.
Settings, further down
A second group, usually below the main sections, covers everything configuration-related for this one app:
- General – your app’s name, identifiers, and basic details.
- Website Connection – the site your app pulls its content from.
- Credentials – the signing files each store requires.
- Connect Google Play / App Store – the accounts AppNatively submits your app through.
- Firebase Configuration – required setup for push notifications and for building your app at all.
You don’t need to memorize this list – each of those has its own doc later in this Help Center, and this page is here to come back to whenever you’re not sure where something lives.
What your app’s Overview page shows you
Overview is the first thing you see when you open an app, and it’s meant to be a snapshot rather than something you configure.
- At the top, your app’s icon, name, niche, and connected website link, with quick buttons to jump straight into the App Editor or send a push notification.
- A row of key numbers for this app at a glance.
- Recent Builds, showing your latest build attempts and their status.
- External Services, a quick connectivity check for GitHub, Firebase, and Google Drive – each with a “Manage” link straight to where you’d fix it if something’s disconnected.
If something in your app isn’t working, Overview is usually the fastest place to check what’s connected and what isn’t before digging into a specific settings page.